Link your Gmail, Google Calendar, and Google Contacts to Talavine
Talavine uses Google's official APIs to read your mail, calendar, and contacts. Because Google
restricts which apps can request those permissions, the cleanest path today is to create a small Google
Cloud project of your own and paste the credentials into Talavine. It takes about ten minutes and
only needs to be done once per Google account.
Why this extra step
Your data, your project, your keys
Google requires a paid annual security audit before an app can ship Gmail, Calendar, or Contacts access
to the general public. Talavine is a local desktop app with no central server, so instead of gating
the feature behind that process we let you create a personal Google Cloud project. Your OAuth tokens
never leave your computer, Google only ever sees your own project talking to your own account, and
Talavine has no involvement in the transfer.
Step 1
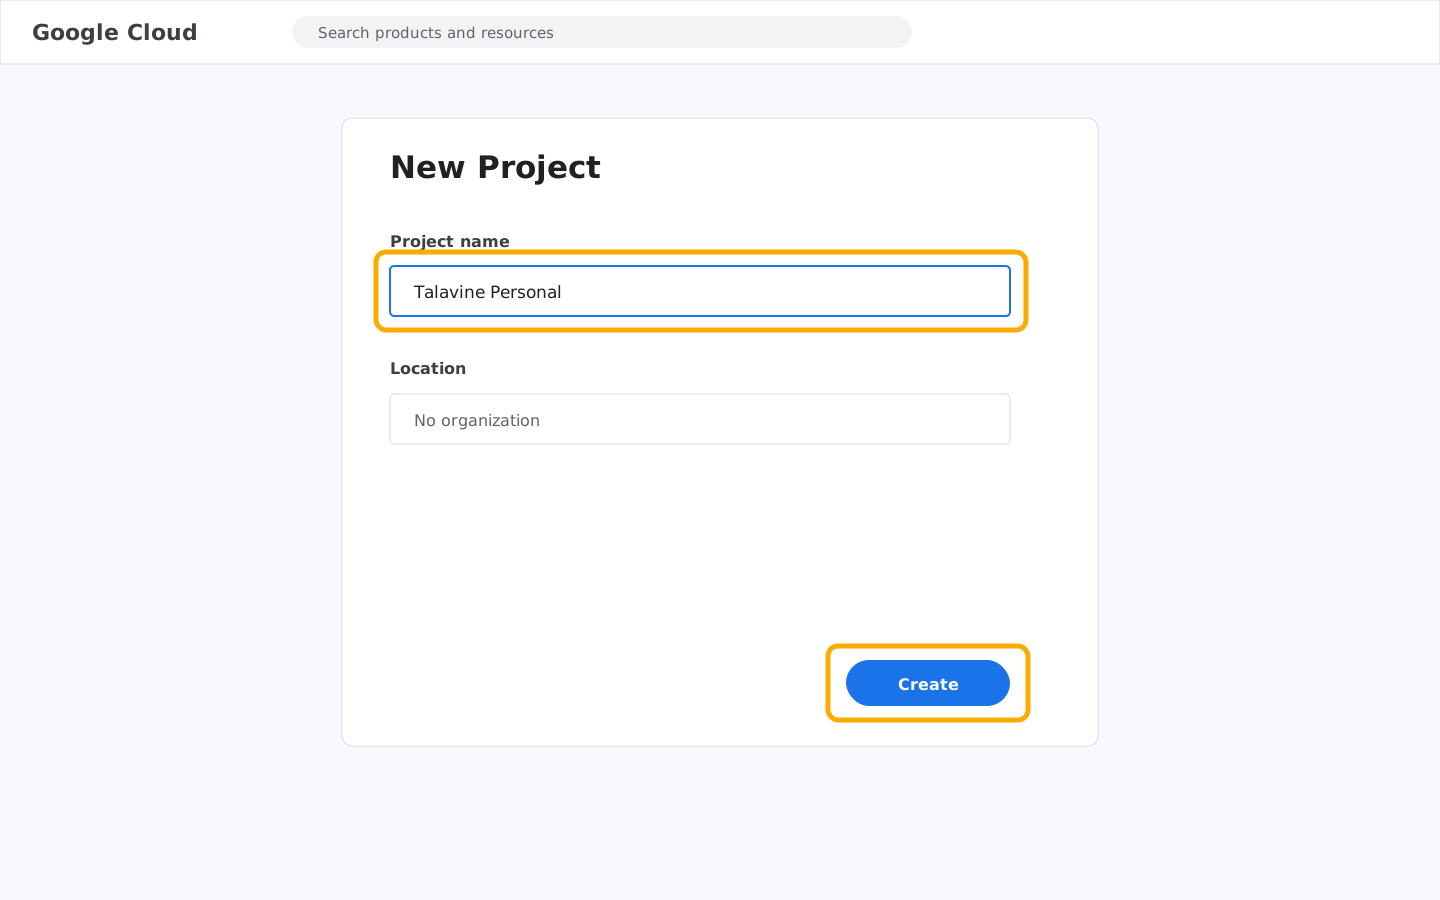
Create a Google Cloud project
Google Cloud · New Project
Sign in at console.cloud.google.com
with the Google account you want to connect. In the project picker at the top, click
New Project, name it something you'll recognize (for example
Talavine Personal), and click Create. When the notification bell
tells you it's ready, switch the project picker to the new project.
Step 2
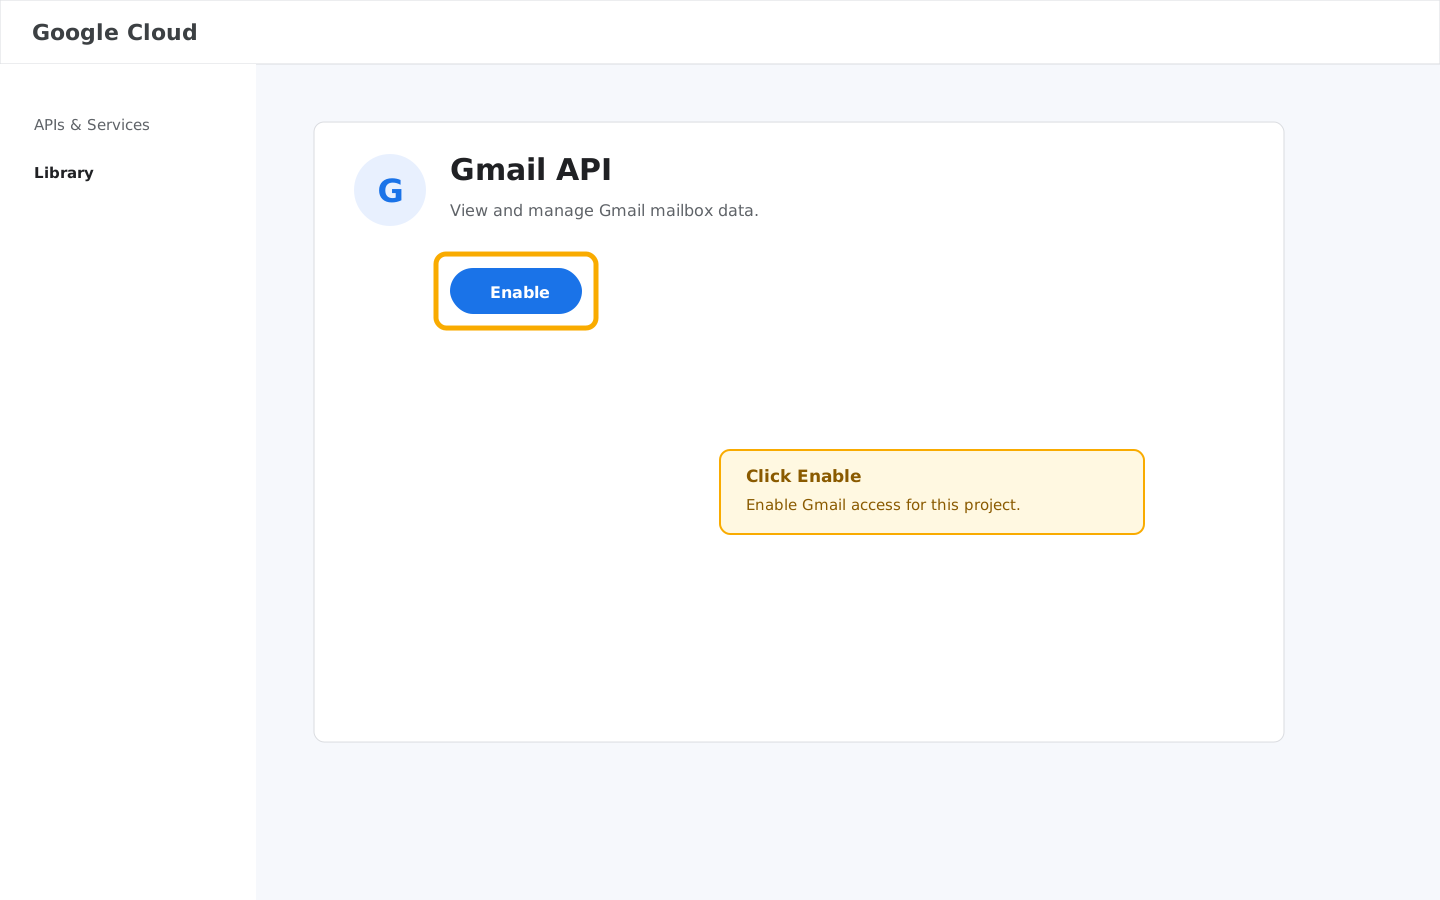
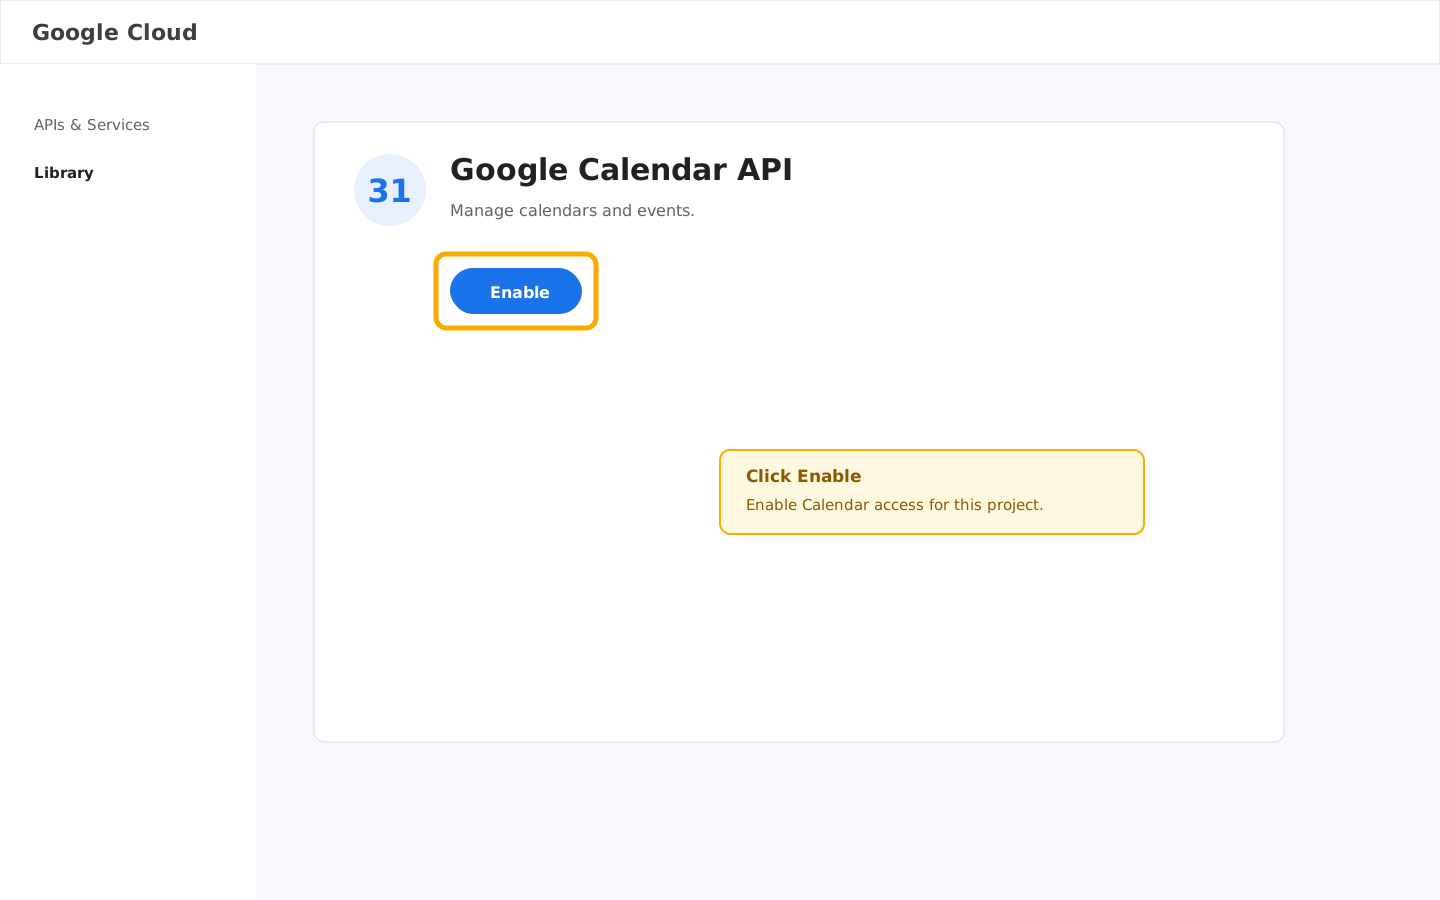
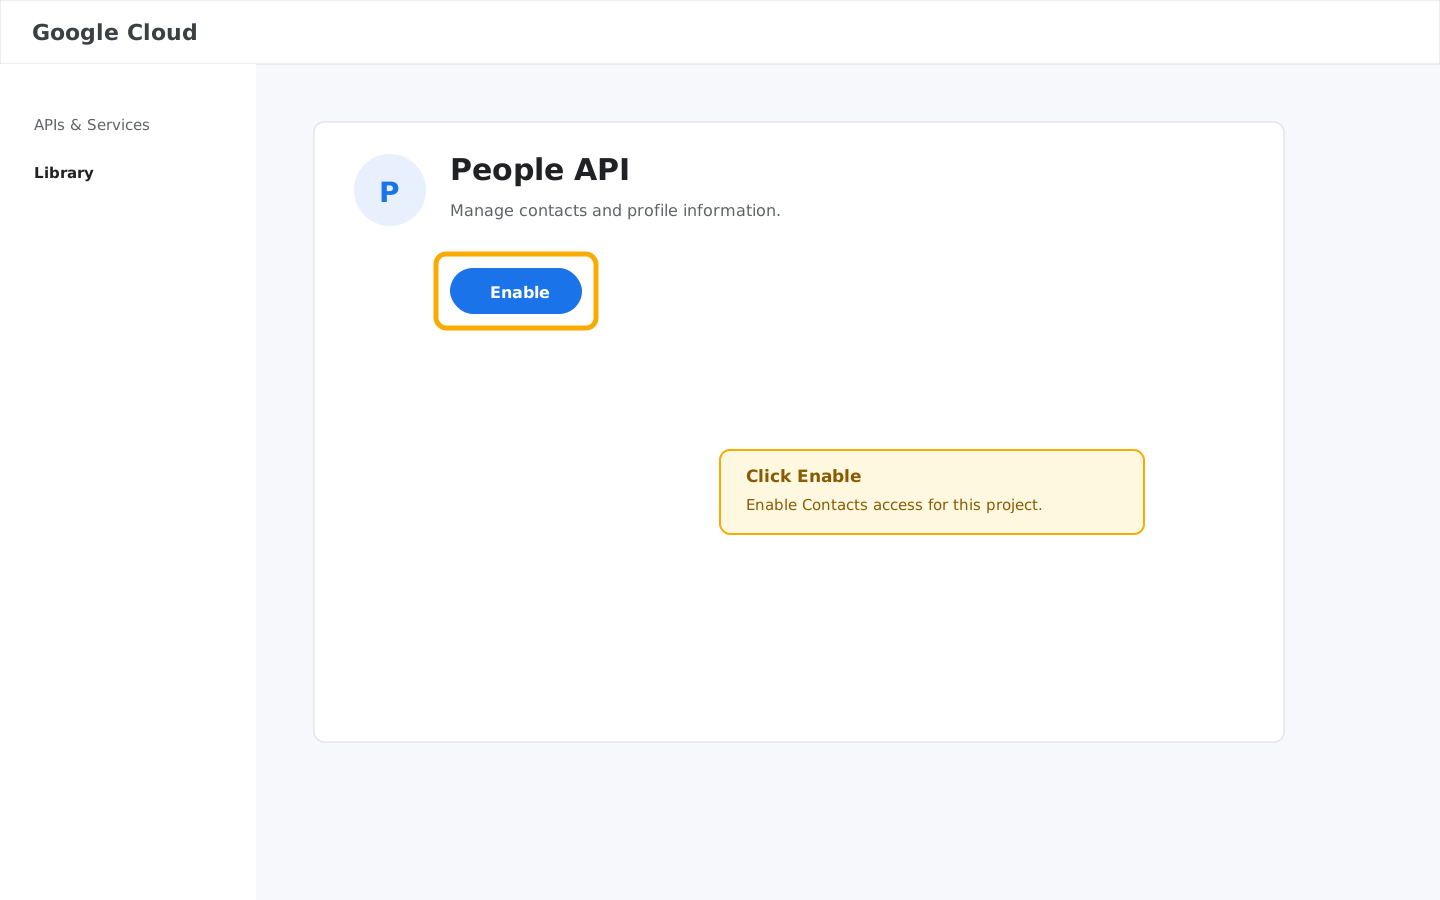
Enable the Gmail, Calendar, and People APIs
Gmail API · EnableGoogle Calendar API · EnablePeople API · Enable
Open APIs & Services → Library,
search for Gmail API, and click Enable. Repeat the search for
Google Calendar API and People API, then enable both of those
too. People API is what lets Talavine sync Google Contacts into the contacts view.
Step 3
Configure the OAuth consent screen
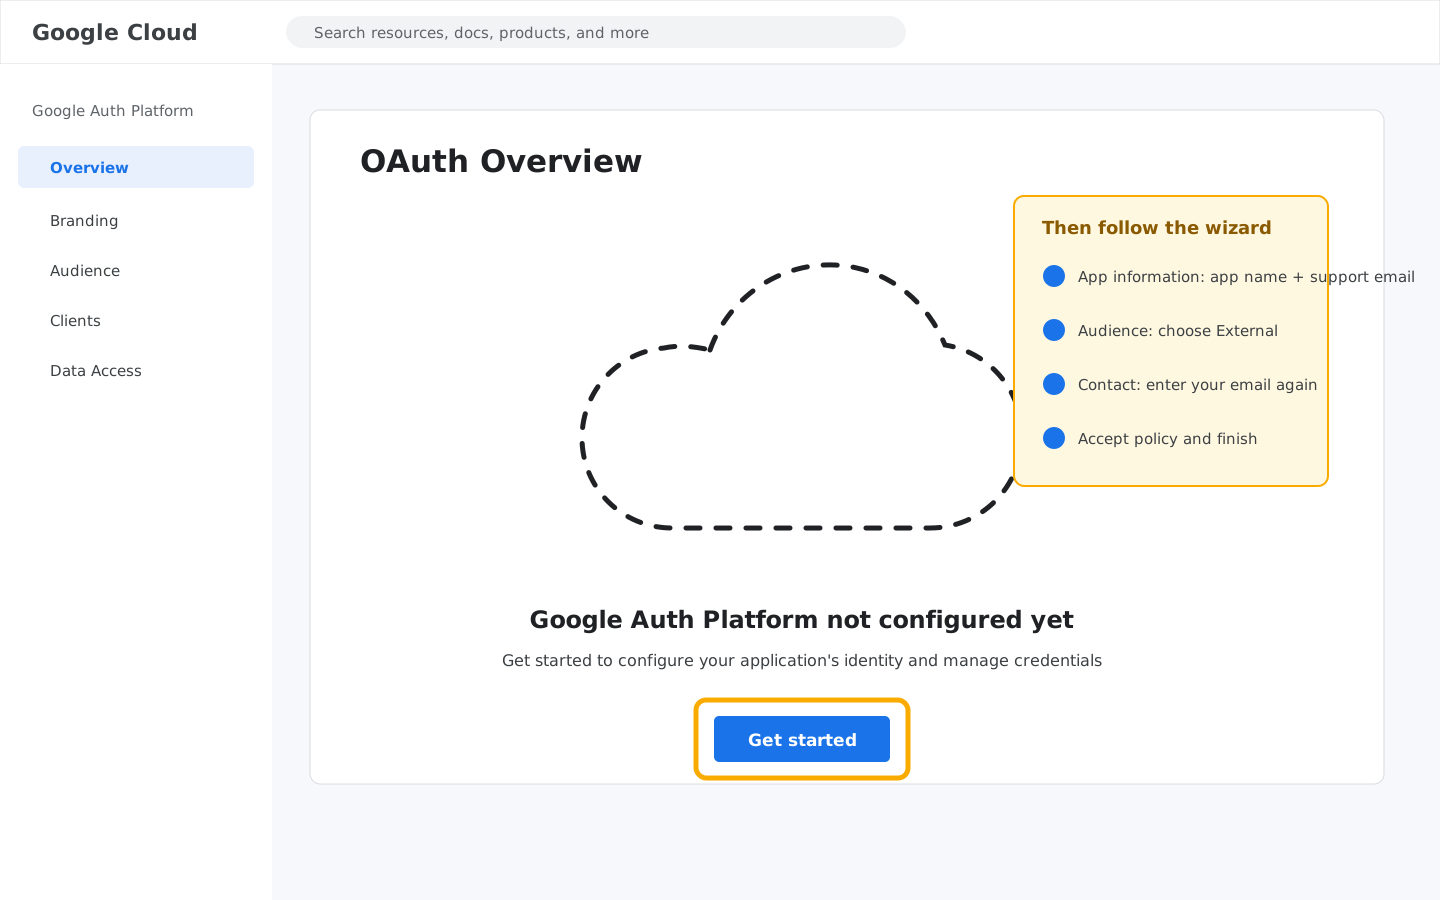
Google Auth Platform · Get started
Go to Google Auth Platform → Overview.
If the page says Google Auth Platform not configured yet, click
Get started. Fill in an app name (Talavine Personal is fine),
choose your email as the user support email, choose External for the audience,
then enter your email again as the developer contact. Accept Google's policy checkbox if shown,
and finish the wizard. The publishing status lives on a different page; we'll switch that next.
Step 3b
Publish the app for durable tokens
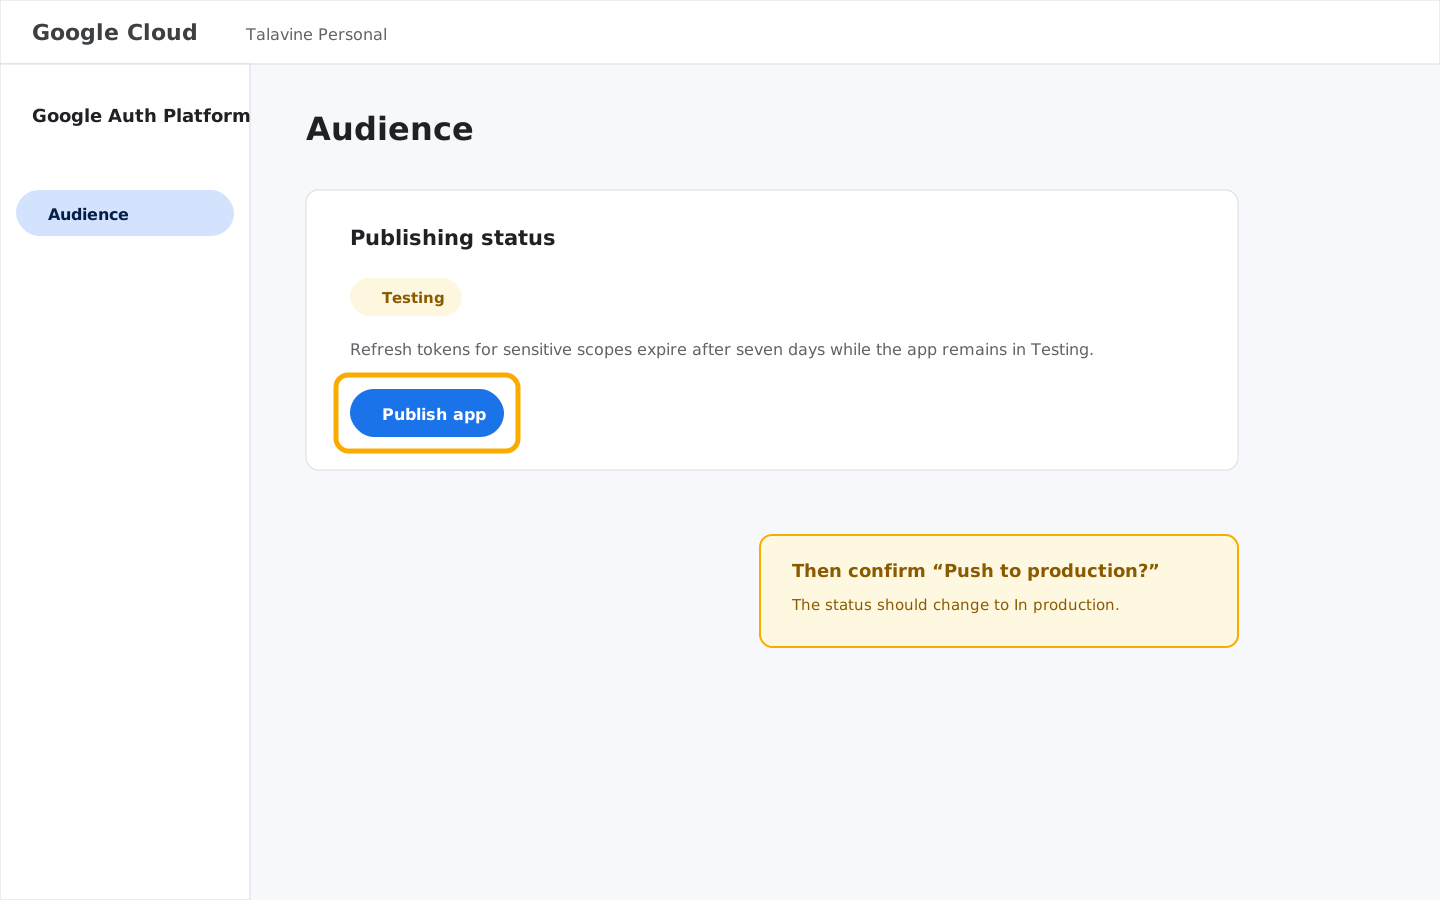
Audience · Publishing status
Open Google Auth Platform → Audience.
Make sure the project picker at the top shows your Talavine project. Find
Publishing status. If it says Testing, click
Publish app. Google will open a Push to production? dialog;
click Confirm. The publishing status should then become
In production. This doesn't mean you need to complete Google's public
verification process for a personal app; it just removes the testing-mode refresh-token limit.
Google may still show the unverified-app warning during sign-in, which is expected for your own
private project.
Don't leave the app in Testing for normal use. For Gmail, Calendar, and
Contacts scopes, Google expires refresh tokens from external testing apps after seven days, so
Talavine would have to ask you to reconnect every week.
Step 4
Create the OAuth client ID
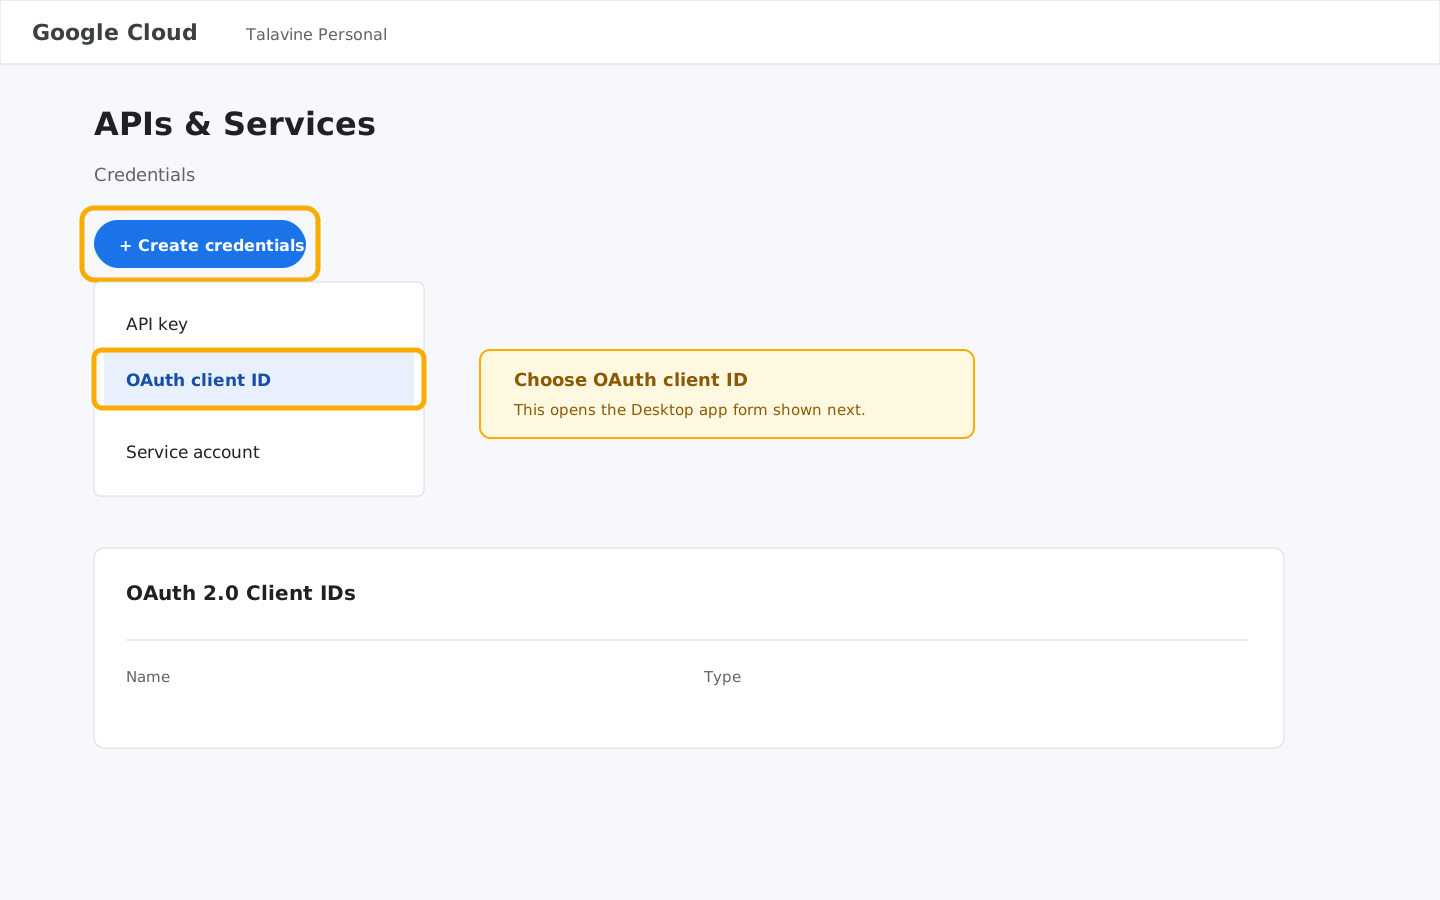
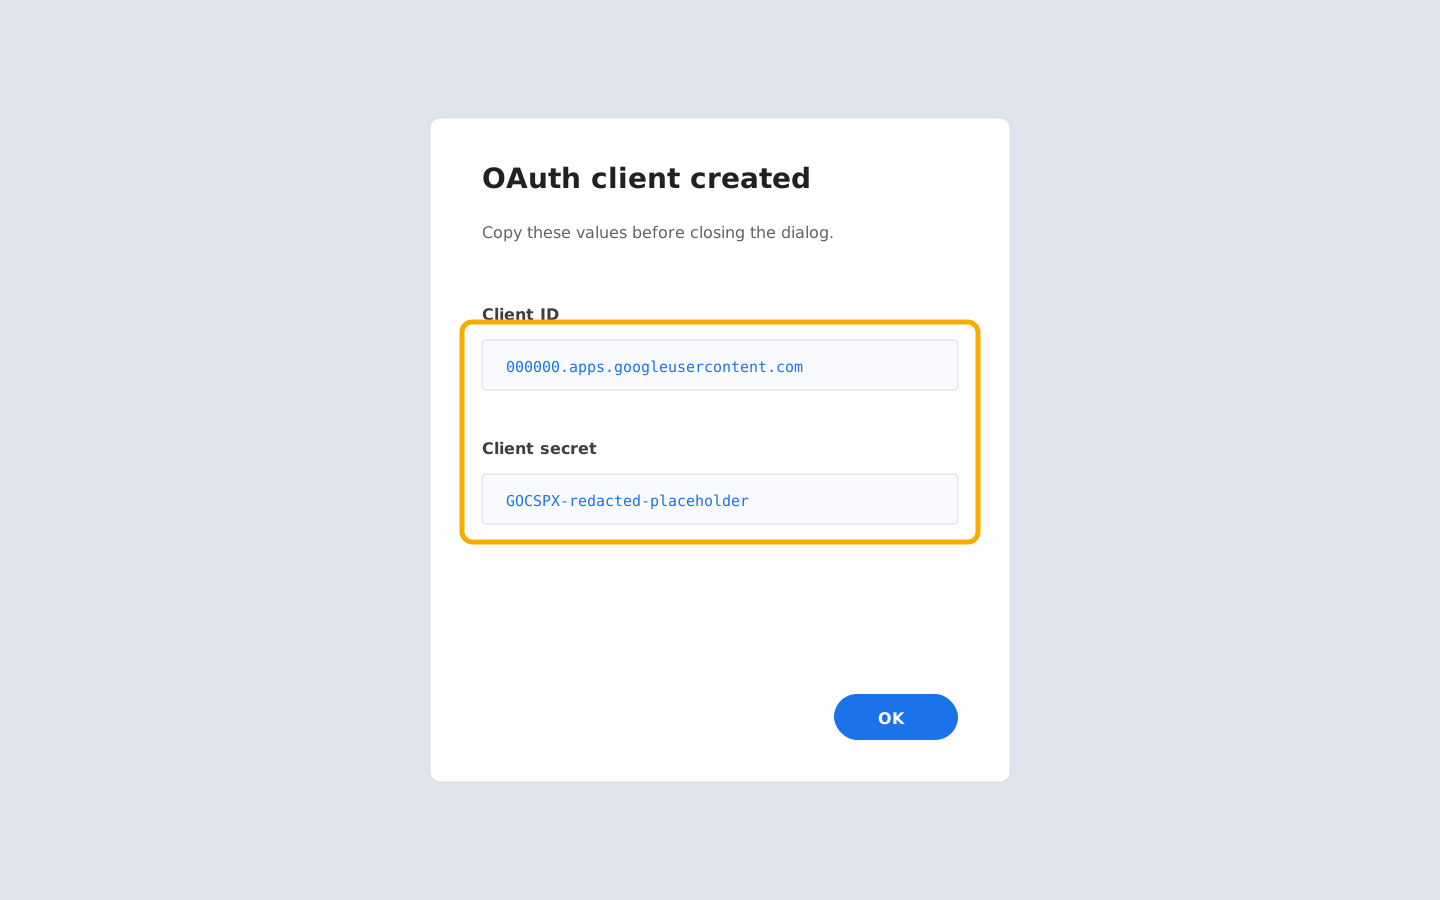
Credentials · Create credentials · OAuth client IDCredentials · Create OAuth clientCopy both values before closing
Open APIs & Services → Credentials,
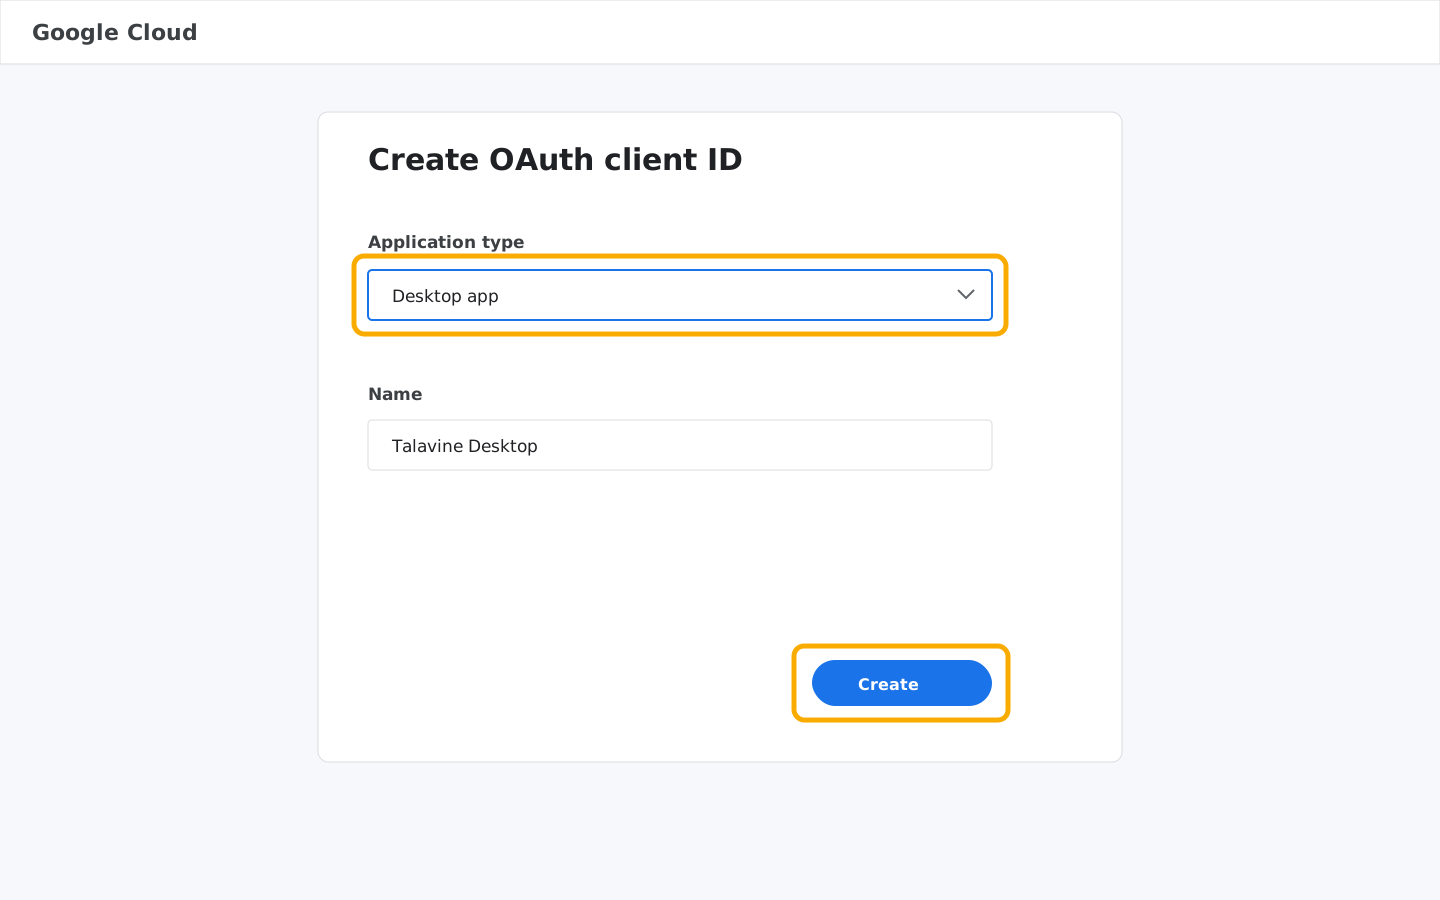
click Create Credentials, and choose OAuth client ID. For
Application type pick Desktop app and give it any name.
Google will show you a Client ID and Client secret. Keep that
dialog open; you'll paste both into Talavine in the next step.
Step 5
Paste the credentials into Talavine
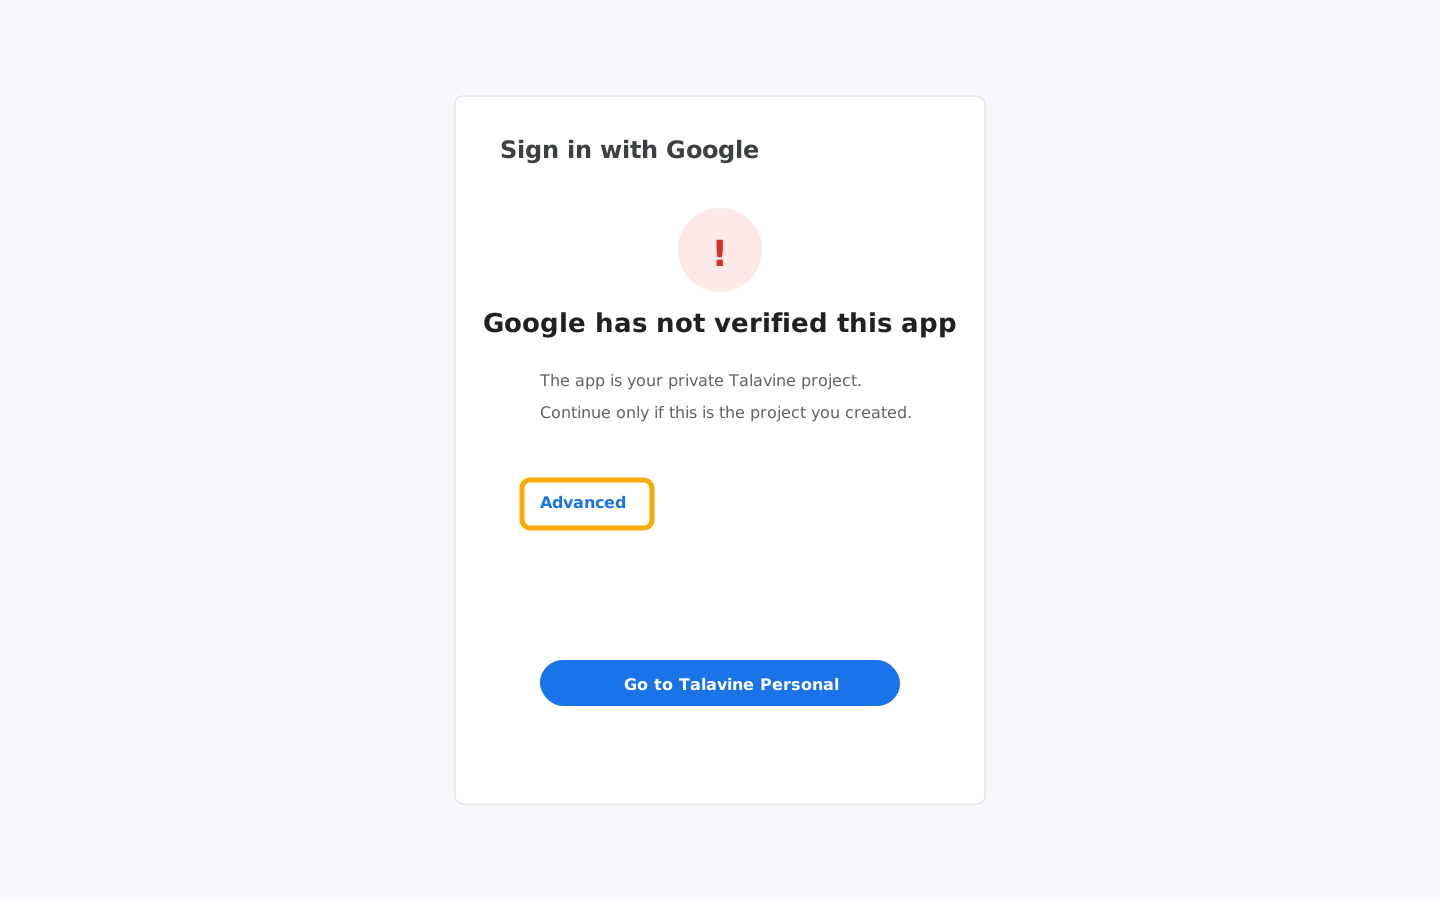
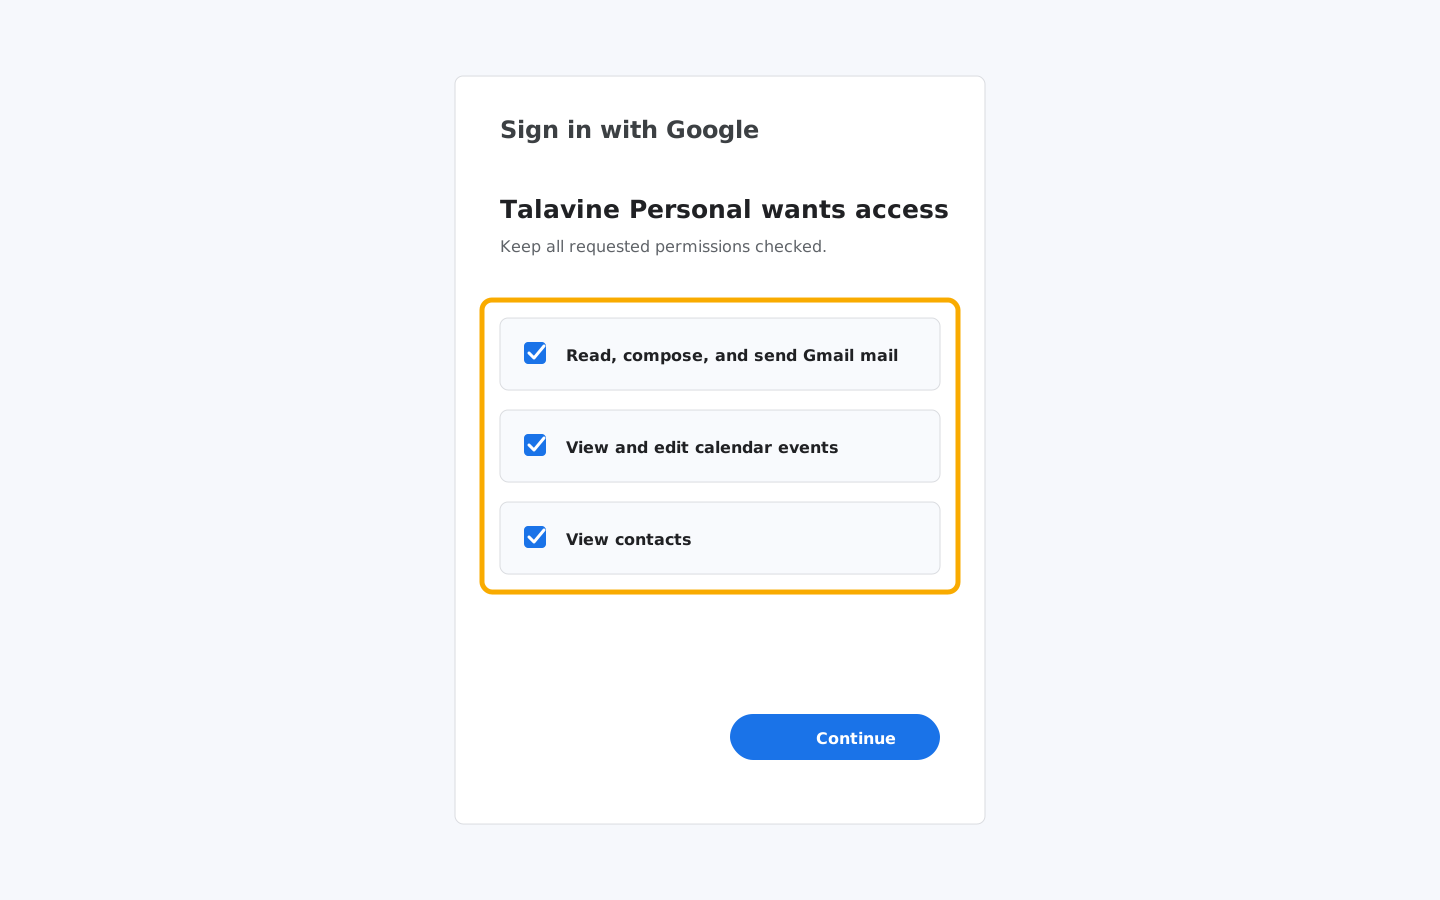
Expected warning · click AdvancedPermissions · keep all boxes checked
In Talavine open Settings → Accounts & Channels → Google.
Paste the Client ID and Client secret from the Google Cloud dialog, then click
Connect Google account. Your browser will open Google's sign-in page. Because
your project is private and unverified, you'll see a Google hasn't verified this app
warning. Click Advanced, then click
Go to Talavine Personal (unsafe).
Google then shows a profile review screen for your name and email. Click
Continue. On the access screen, check Select all so the Gmail,
Contacts, and Calendar permissions are all selected, then click Continue again.
Google will redirect back to Talavine and show the success page.
Step 6
You're done
Talavine will pull your inbox, calendar, and contacts on the normal sync schedule. You can
revoke access at any time from
your Google account permissions page
or by deleting the OAuth client from your Cloud project. Removing the credentials from
Talavine's settings screen also clears every token stored on this machine.
Troubleshooting
The warning screen has no "Advanced" link. Your consent screen is set to
Internal. Switch it to External in Step 3, or make sure you're signed in with
the same Google account you added as a test user.
"Access blocked: Talavine has not completed the Google verification process".
First make sure the OAuth app is In production on the Audience page. If you
intentionally keep it in Testing, add your Google address to the
Test users list, but expect the refresh token to expire after seven days.
Talavine asks me to reconnect every week. Your OAuth app is almost certainly
still in Testing. Open Google Auth Platform → Audience for the project and
publish it to production, then reconnect the account once in Talavine.
The connection works but nothing syncs. Double-check that the Gmail API,
Google Calendar API, and People API are enabled under your project (Step 2). Enabling them is
per-project, not per-account.
Security notes
The Client ID and Client secret identify your project to Google. They're not a password
to your mailbox; on their own they can't read any of your data. Talavine still encrypts them
at rest along with the refresh token Google issues after sign-in.
Because the project is yours, only Google accounts you explicitly add as test users can sign in to
it while it is in Testing. Once you publish the personal project to production, Google may allow up
to 100 unverified users through the warning screen; for Talavine's normal personal-use path,
that should just be you or the few Google accounts you own.
 Talavine